Showing posts with label Design Interrupted. Show all posts

Monday, June 11, 2012

Images from the Home Sweet Home Exhibition in Ekenas, Finland...

 Above and Below: The Cu3o Cabinet... 

A few images from the ongoing Home Sweet Home exhibition, taking place in Ekenas (Tammisaari) Finland. The opening, which took place on May 24, was a brilliant event, where all the elements of a successful gallery opening - the displays, the people, the venue, the food, the weather - managed to gel into a beautifully choreographed and synchronized concoction... 

For a short summary of the event, check out the reportage of the exhibition in a recent episode of the Pixel cultural program (in Swedish - only visible in Finland)... 

The exhibition concludes on October 7, 2012... 


 The 'Living Room' space, with designs by Thomas Sandell, Anne Kyyro Quinn, and and Eero Koivisto...

The 'Kitchen' area, with designs by Katarina Andersson,  Eero Koivisto, and Stina Lindholm...

 Above and Below: Laser Toast - Probably the best Laser-cut Peanut-Butter & Jelly Sandwich in the World...


 A set of Bowl and Tray designs from the Interrupted Series... 


A traditional building flanking the courtyard of the Pro Artibus Foundation... 

Balloon shadows on a wall... 

The Pro Artibus Foundation's wall logo...

Monday, May 21, 2012

Home Sweet Home Exhibition, Ekenas/ Tammisaari, Finland...


Later today I'm heading to Finland for the opening of the Home Sweet Home exhibition, organized by the Pro Artibus Foundation. We're scheduled to exhibit three pieces, the Cu3o Cabinet, the Bowls Interrupted, and some Laser Toast (probably the best laser-toasted PB&J sandwich in the world)... 

The exhibition opens on May 25, and runs until October 7, 2012... If you happen to be in the hood, please stop by... 

Wednesday, April 11, 2012

Makerbot Subversions - Designed Paraphernalia...


A few pieces made with our Material Library's Makerbot that in some of the design attempt to subvert (or take advantage of) the fact that this fabrication process doesn't use/ build any supports (see the designs towards the bottom of the post, where the builds have been selectively encouraged to 'unwind')... 
The other designs use the interrupted technique that, in the case of Makerbot builds, reveals a more honeycomb-like (hexagonal) support structure rather than the square grid made by the FDM process... 

The designs aim to take advantage of the particulars (idiosyncrasies) of this fabrication process and it would not make sense, or be realistic, to make them by any other means. Here the additive fabrication process and the conception of the design are inherently entwined...

Digital Wabi-Sabi indeed...

A big Thank You to Richard Lombard for all the help with the realization of the pieces... 


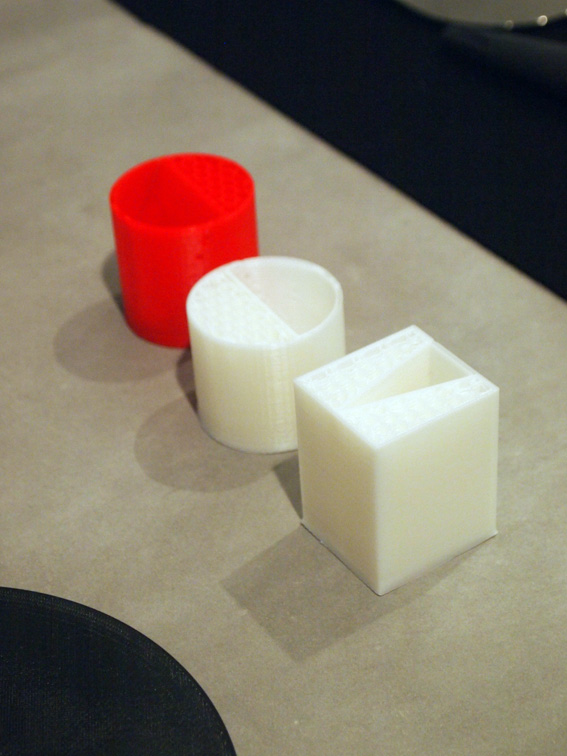
Top, Above & Below: A few renditions of a small condiment dispenser using the interrupted fabrication technique.


Above and Below: A red and white version of the 'Arrow' condiment dispenser. Here the wide end of the cavity can be used when larger quantities of the condiment are needed, and the narrower, more pointed tip when less, or more controlled, amounts are preferred. 


 Above & Below: A two way condiment dispenser, where either end (one inner surface being more oblique and textured than the other) of the dispenser can be used...


Above & Below: A two tier condiment dispenser where the condiment-storage-cavities are angled in such a way that either can be poured without the other one leaking (see an earlier design using the same technique by clicking here)... 


 Above & Below: A few bowls where the inner cavities were angled in such a way to just slightly go beyond (or, in the case of the green bowl, subtly 'trickle over') the oblique build tolerances of the Makerbot in our Materials Lab. 


Above & Below: A mini vase


 Above & Below: A 'prickly' bracelet also exploring the Makerbot tolerances in a more textured and dense way...


The Makerbot in our Materials Library

Thursday, February 16, 2012

Design Interrupted and Meat & Bone Trays...


A few images of a set of small, FDM made, trays that all take advantage of some of the particular idiosyncrasies affiliated with the FDM process... Here the Meat & Bone technique (where the usually removed support structures are allowed to become an inherent part of the final design), as well as the Design Interrupted method (in which the digital file of the design is modeled with a stretch of extra, residual, build in the Z axis to allow the model to appear and work as a completed piece once interrupted mid-build), have both been used and even combined in their realization...  

All the included designs fit within the roughly 20 X 20 by 20 centimeter build frame of the FDM machine we have access to... 


 Above and Below: The Stratum Tray, that uses the Meat & Bone technique in its realization. 

 Screen image of the digital file for the Stratum Tray showing the, here floating, layers up to which the support materials were automatically constructed by the software...

 Image of the Stratum Tray being built...

Video of the Stratum Tray being built...


 Above and Below: Images of the Deco Tray. This design uses both the Design Interrupted and the Meat & Bone method in its realization...


 Above and Below: The Tooth Gum Tray. An early design using the Meat & Bone FDM technique...


Thursday, January 26, 2012

Stackable Bowl&Tray Interrupted...


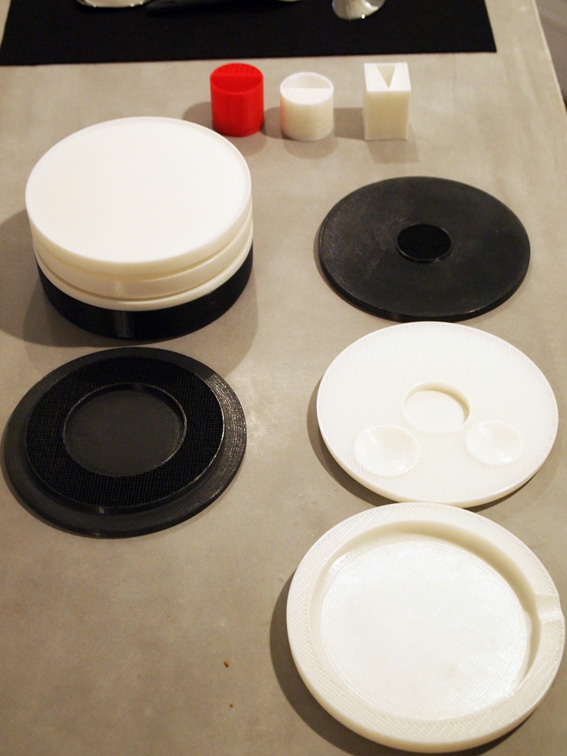
An additional design submission from the Interrupted Design series, where the FDM fabrication process is intentionally interrupted mid-build to reveal the inner support structures, a feature that consequently becomes a key characteristic of the final design... The stackable bowls and trays have all their particular, often quite subtle, variations in function, use and execution, a list of which is included below... The connection point of the bowls and trays are uniform, and can be stacked in any sequence desired... 


 Shallow Bowl - with a removable partition

Thin Tray/ Lid - with a large perforated top (good for draining or cooling food on top) 

 Deep Bowl - same digital model as the bowl above, only here the fabrication process was allowed to proceed further 

Thick Lid/ Tray - same as the lid above, only here with a thicker, more insulated, base

Sushi Plate - with concavities for soya sauce, wasabi and pickled ginger (along with an area for sushi or sashimi pieces) 

Tray/ Cover for the Sushi Plate - with its own central pedestal for any more celebratory pieces

Spout Bowl - a bowl with a small spout 

 Ring Tray/ Cover/ Plate - with a wide perforated ring, allowing both the display of fine food on top of the surface as well as within it

Grind Bowl - here the bowl build was 'completed' but, in post-production, selectively ground-down to (re)reveal the inner grid

Plan view of the Grind Bowl 

The Sushi Plate and Tray/ Cover